
| Line 12: | Line 12: | ||
---- | ---- | ||
[[File:CAEDM Mailing List (0b).png|400px|thumb|right]] | [[File:CAEDM Mailing List (0b).png|400px|thumb|right]] | ||
| − | # | + | #Log into CAM |
#:*To start, log into the [[CAEDM Account Manager | CAEDM Account Manager]] (or [https://ssl.et.byu.edu/cms CAM]) with your CAEDM username and password | #:*To start, log into the [[CAEDM Account Manager | CAEDM Account Manager]] (or [https://ssl.et.byu.edu/cms CAM]) with your CAEDM username and password | ||
#:*Click on the ''Mailing Lists'' link. | #:*Click on the ''Mailing Lists'' link. | ||
Revision as of 17:41, 6 November 2012
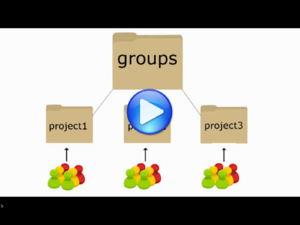
- Group Mailing Lists is a system offered by CAEDM that allows a user to send mass emails to all members of a group quickly and efficiently. This is especially useful for professors or group leaders to communicate with all of the members of a project group or research group, but it is available to all CAEDM users to use as they need.
How to Create a CAEDM Mailing List
For further information about CAEDM:
- Log into CAM
- To start, log into the CAEDM Account Manager (or CAM) with your CAEDM username and password
- Click on the Mailing Lists link.
- Create a New List
- From this screen:
- New groups can be created
- Current subscriptions can be reviewed
- Current subscriptions can be deleted
- The user can subscribe to new groups.
- To create the new group, click on the Create a New List button.
- From this screen:
- Name the Group
- Name the new group
- Be sure to omit spaces and all special characters. They are not allowed.
- A -l will be added to the end of the name, creating the address of the new list to access later.
- Name the new group
- Add Addresses to the List
- Add email addresses to the list.
- Enter only one address per line.
- Any addresses without a domain will be automatically assigned the domain username@et.byu.edu.
- Enter only one address per line.
- Add email addresses to the list.
- Add Editors
- Add editors to the list if the editor has to recieve the email also, they must be a subscriber also
- This is especially important if there are more than one editors
- Neither will recieve emails unless they are also subscribers
- Set Security Settings
- Set desired list security.
- Depending on the needs of each specific mailing list, it would be a bad option to allow subscribers access to use it.
- Create the List
- The List is finished, simply click the Create Group button.
- You will have to wait a few minutes for the system to finish applying the changes to the group.
- After the system is updated emails are sent by composing an email in your preferred browser. Set the Recipient as listname-l@et.byu.edu. It will be forwarded accordingly to all members of that list.
How to Edit existing Mailing Lists
- Click on the Edit button next to the group that you wish to edit.
- Follow the steps above to edit configuration setting.


.png)
.png)
.png)