LabConnect allows CAEDM users to remotely access desktop computers in various college and department labs from their Windows computer from off campus. Some of these desktop computers are just standard lab machines, others may have special department software or hardware attached to them. LabConnect uses the Microsoft RDP client in conjunction with special broker software to connect users with an available machine with the needed resources.
Contents
How does LabConnect differ from Z-Connect?
Z-Connect is specifically designed to handle graphics intensive applications like CAD. The user experience typically gives the remote user a desktop on a high-end workstation. The software installed on Z-Connect is limited to applications that require or use intensive graphics. There are a limited number of Z-Connect servers available. Z-Connect has clients for Windows and Linux. LabConnect and Z-Connect use a very similar client to connect to remote servers. The user experience is very similar, except Z-Connect is higher performance for graphical intensive applications.
LabConnect was rolled out Winter Semester of 2020 to meet the increased demand for remote computing due to all classes being taught online starting in March of 2020. The user experience of LabConnect is very similar to Z-Connect, except graphic-intensive applications may jitter or drop frames occasionally. LabConnect may be the only way to access some department software, and may still be available when Z-Connect is completely full. LabConnect is currently compatible with both Linux and Windows.
LabConnect Update
As of fall semester 2023, the old LabConnect client has been depreciated in favor of a webclient. The new webclient currently works with Windows and Linux. Mac support is under development.
Using LabConnect
Windows and Linux
To use LabConnect on Windows or Linux, please go to https://connect.et.byu.edu/ and log in with your CAEDM credentials.
macOS
Setup
Installing an RDP client
You will first need to install an RDP client. The provided instructions use Windows App; however, feel free to use any other compatible application.
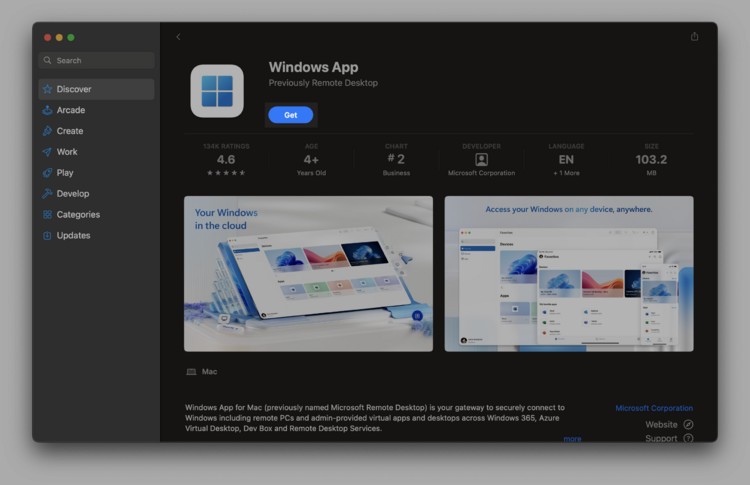
- Find the Windows App by following this link https://apps.apple.com/us/app/windows-app/id1295203466. Or, search for "Windows App" in the App Store.
- Click "Get."
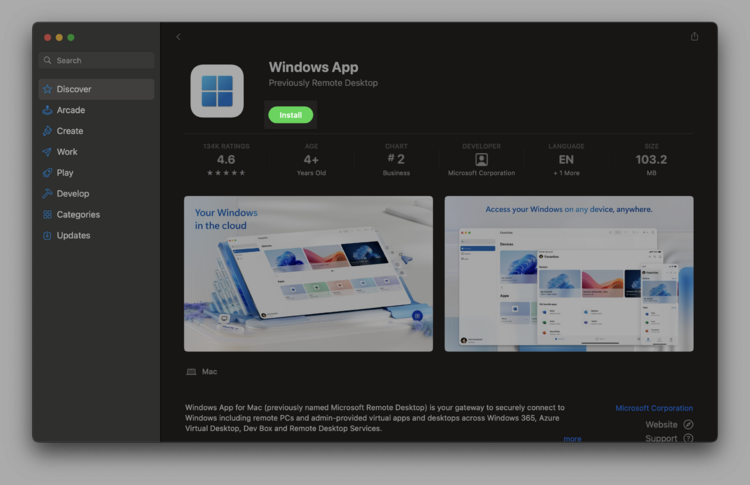
- Click "Install."
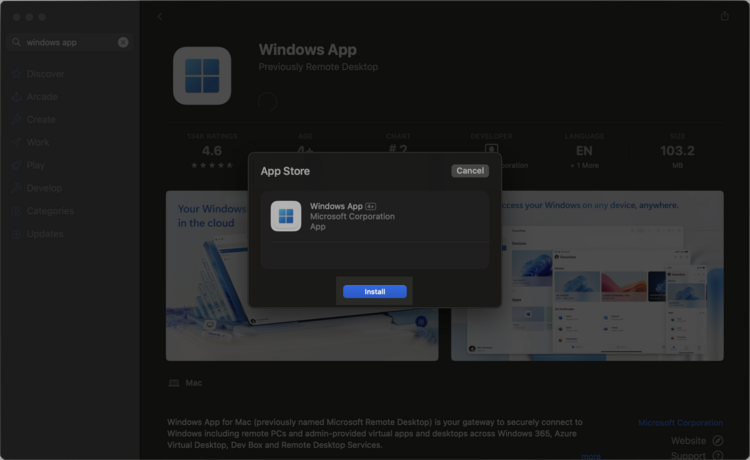
- In the prompt that appears, click "Install." You may have to input your Apple Account password.
- After the installation is complete, follow the Connecting instructions given below.
Connecting
After installing an RDP client, follow these instructions each time you would like to connect to a CAEDM machine. The instructions provided are specifically for the Windows App; however, the process will be similar for most RDP clients.
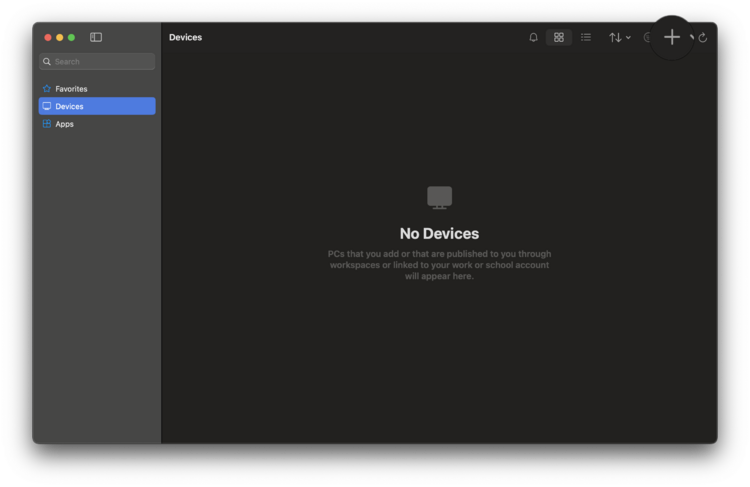
- Open Windows App.
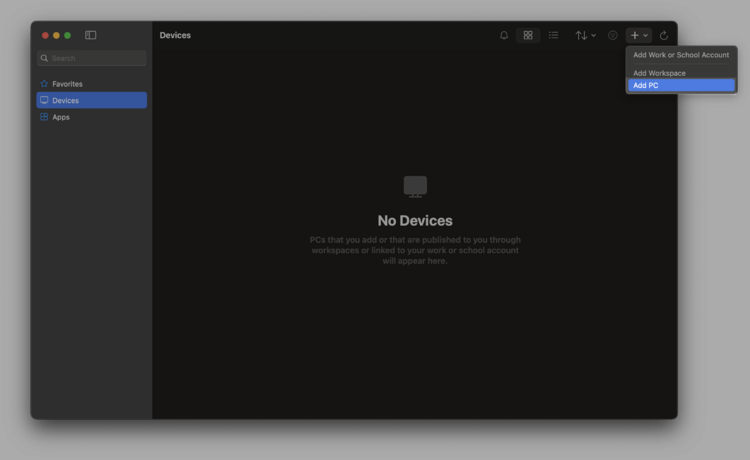
- Click the "+" button in the top right corner of the window.
- Click "Add PC."
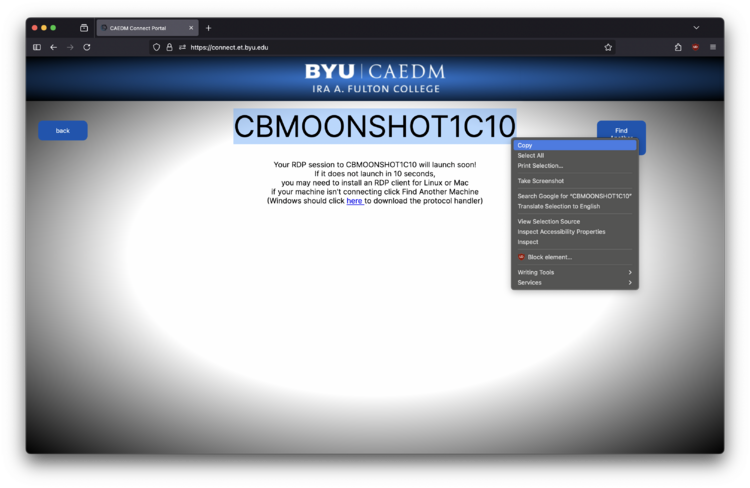
- Go to https://connect.et.byu.edu/ and log in with your CAEDM credentials.
- Click the icon corresponding to the machine you would like to use.
- Copy the machine name from the machine you were given.
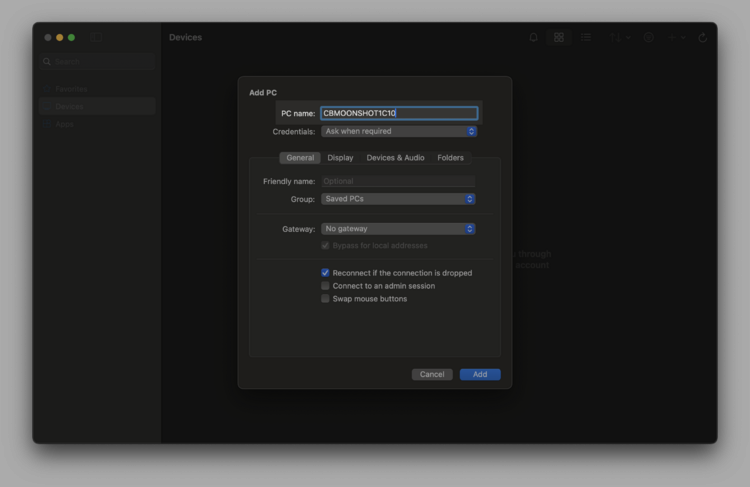
- Go back to the Windows App and paste the machine name into the "PC name" entry.
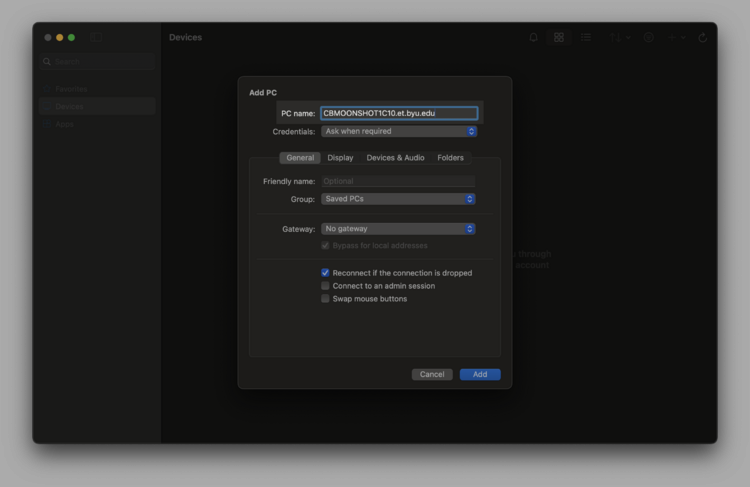
- Add the text ".et.byu.edu" to the end of the machine name. It should look something like "CBMOONSHOT1C10.et.byu.edu"
- Then you must either: Connect to the CAEDM VPN or put "rdpgateway.et.byu.edu" into the "Gateway" section.
- Click "Add."
- Double-click the PC you added in the Saved PCs section.
- In the window that appears, enter your CAEDM credentials and click "Continue."
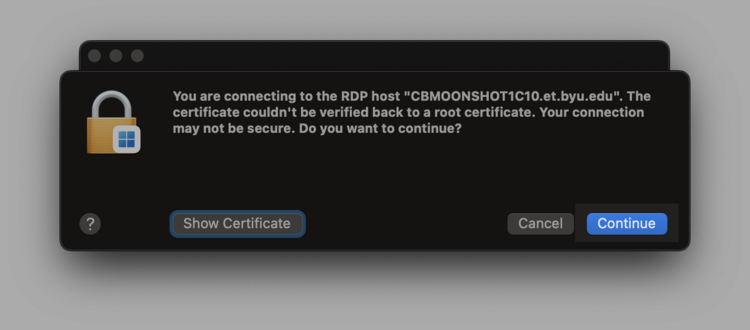
- It will then prompt you to accept the certificate. Click "Continue."
You should now be connected to the remote machine.

